
CRH Shorthand
This is my tool for fast writing, self-reflection, and expressive lettering.
My original goal was to design a form of shorthand that would be easier for me to learn than existing systems. Toward this goal, I based the system on existing English spelling, kept the rules relatively simple, and took advantage of muscle memory from typing on a QWERTY keyboard. After using this system for a bit, I discovered that in addition to letting me write faster, it also quiets my internal editor: as it’s a bit harder to read than regular writing, I am able to look at the words I’ve just written without immediately perceiving their meaning. This makes for a more meditative writing experience than using the regular alphabet.
Because the system allows me to write quickly and with less self-judgment, I found it useful for journaling, and so I have used it extensively in the years since I designed it. Writing a few thousand pages of text has made me comfortable using this system expressively and exploring various lettering styles.
Gallery
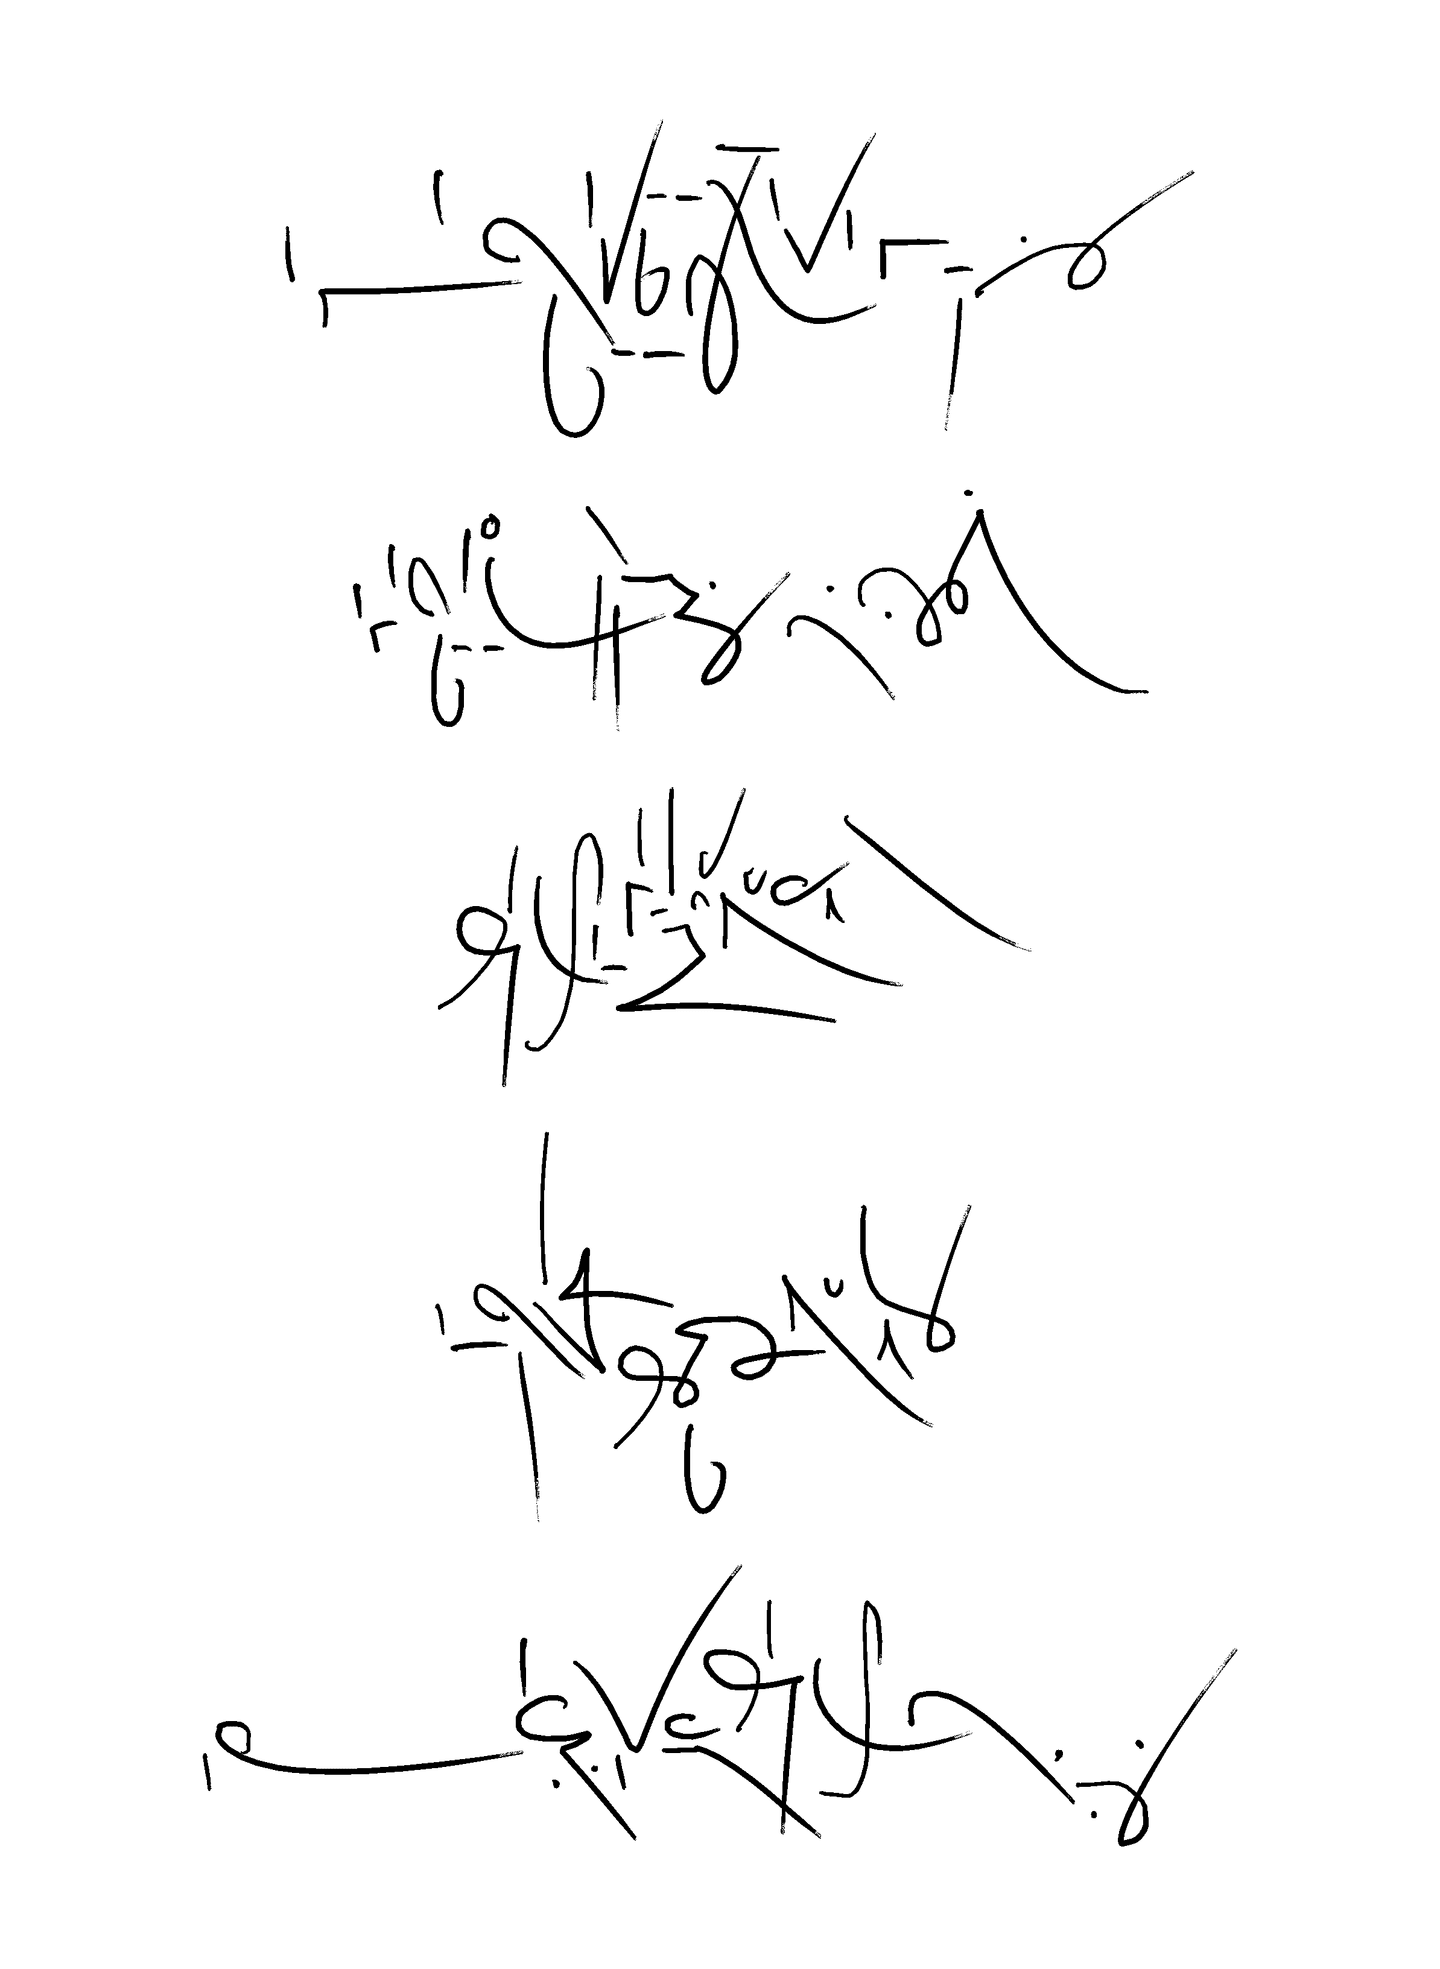
The first verse of I Haven’t Seen This Day Before by the innocence mission
“someone tell me what to do”

A monogram of my name
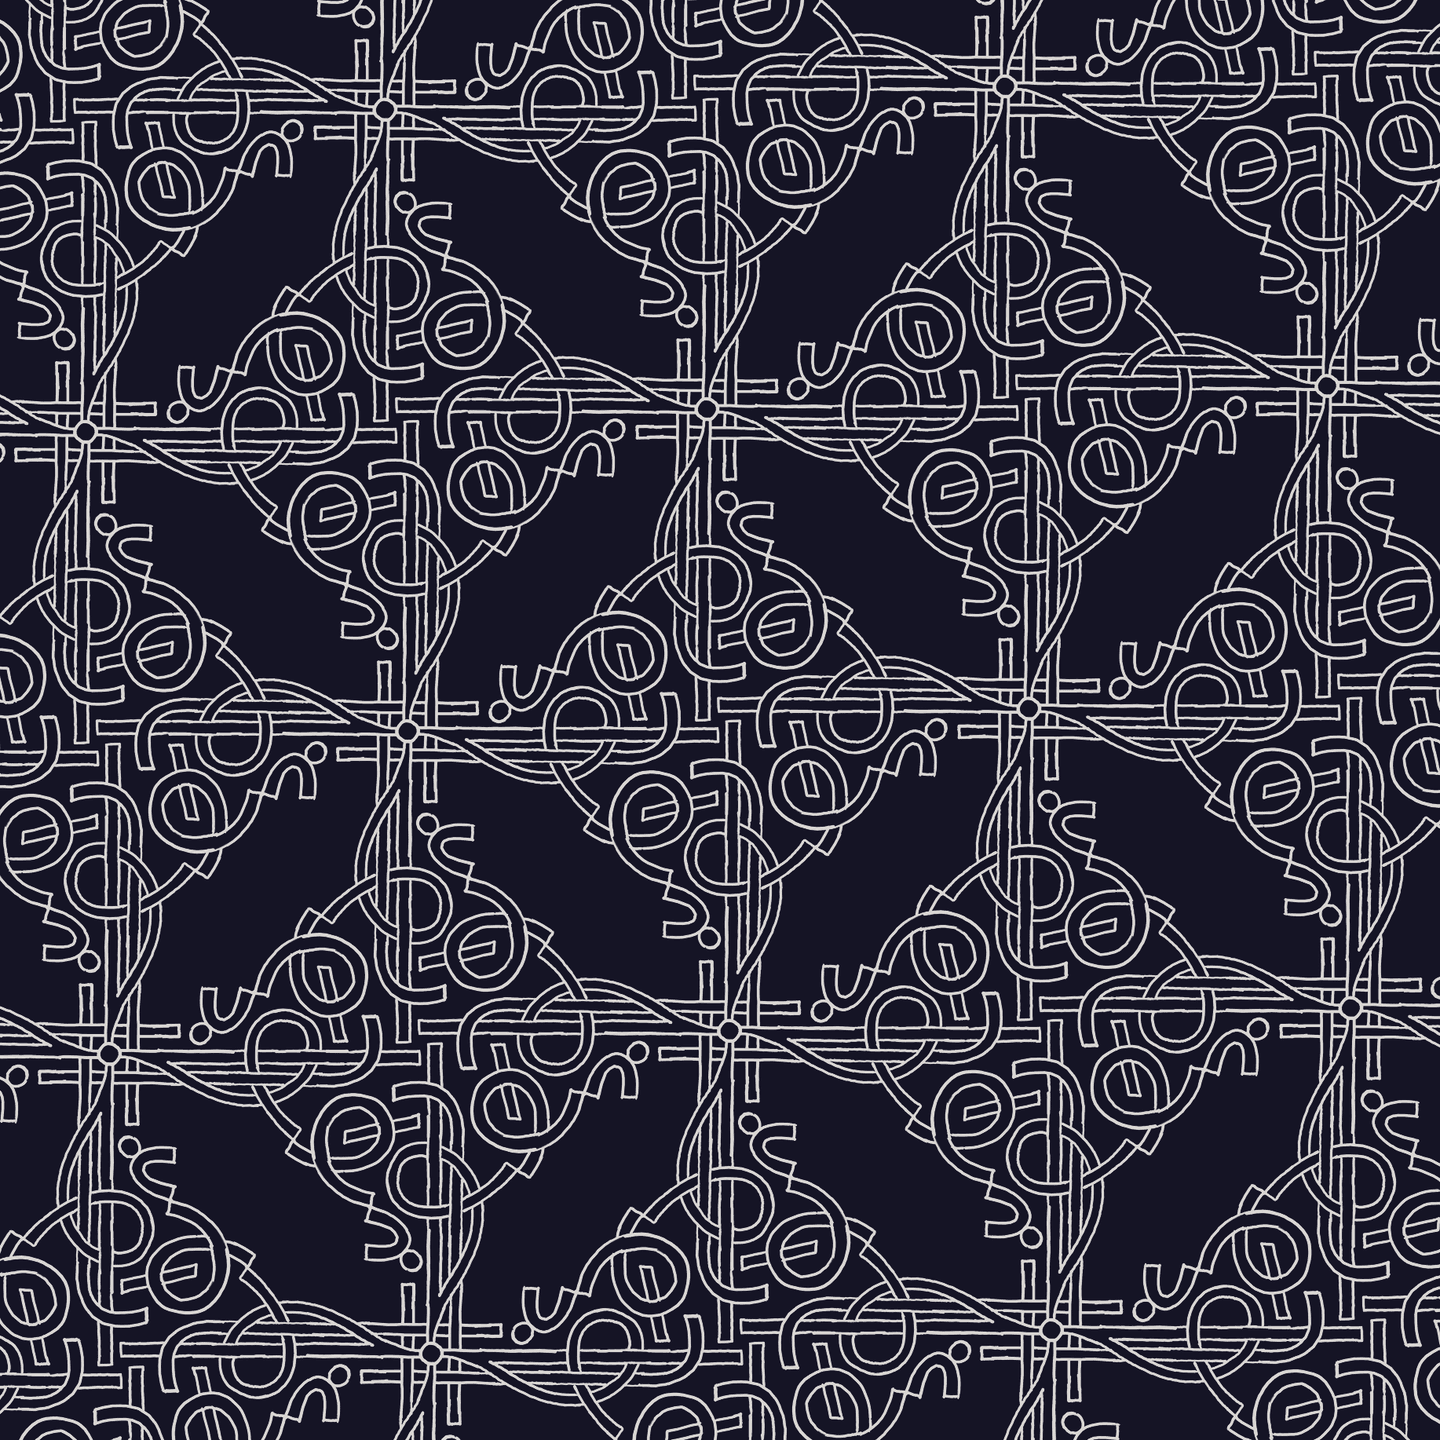
Many copies of the word “appropriate” woven into a pattern
Geometric calligraphy (about how I should really be working on my assignments instead of doing geometric calligraphy)
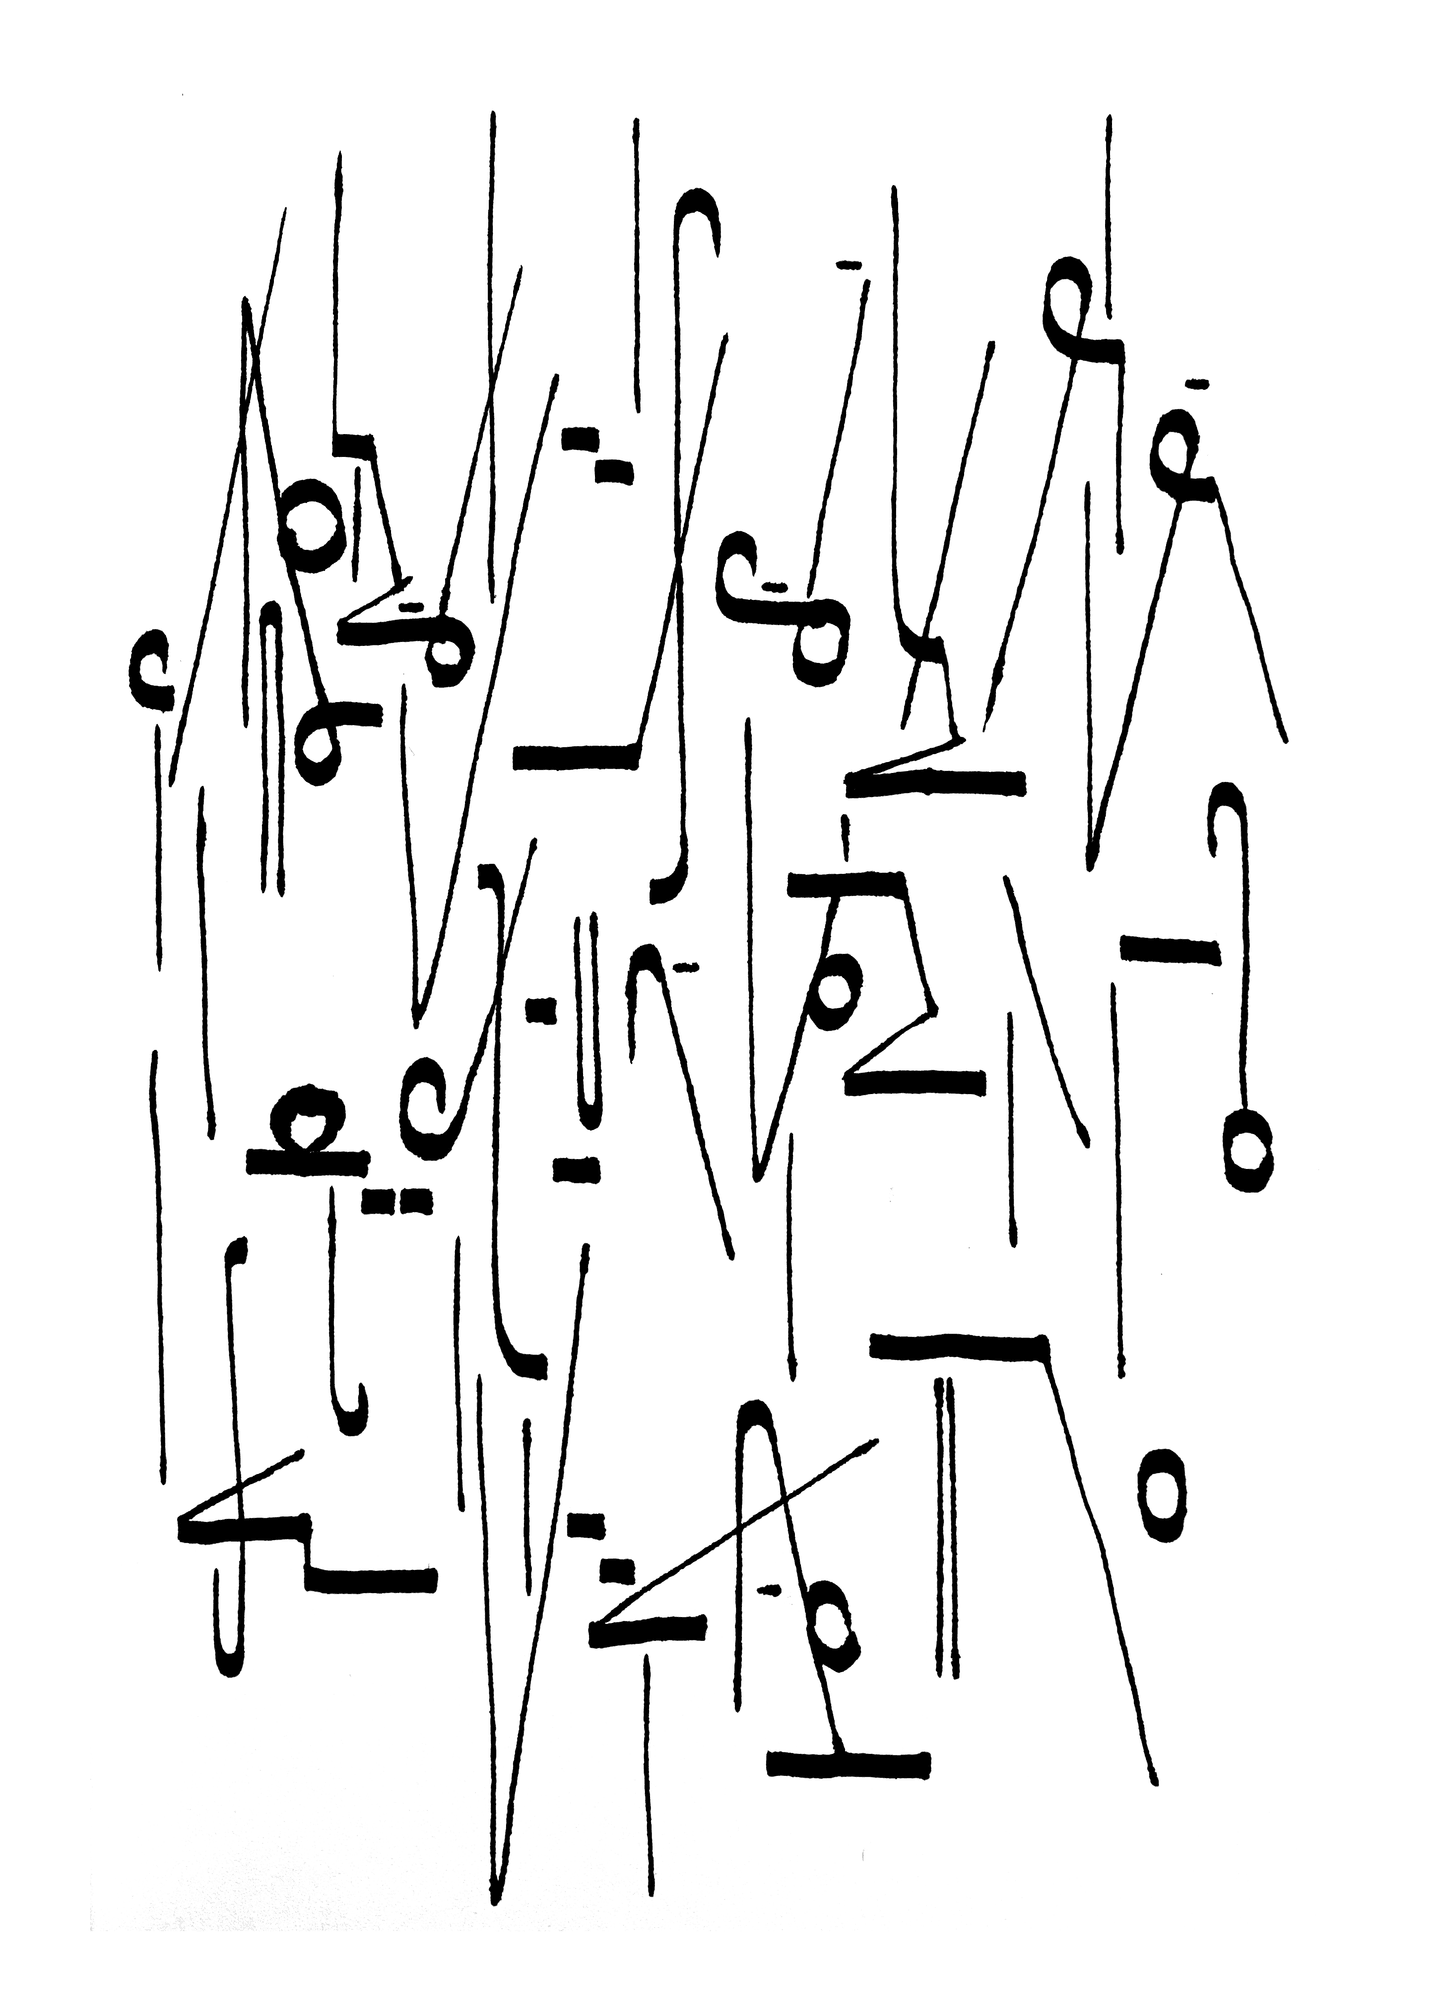
It can feel relaxing to write down my thoughts, even if I won’t be able to read them again

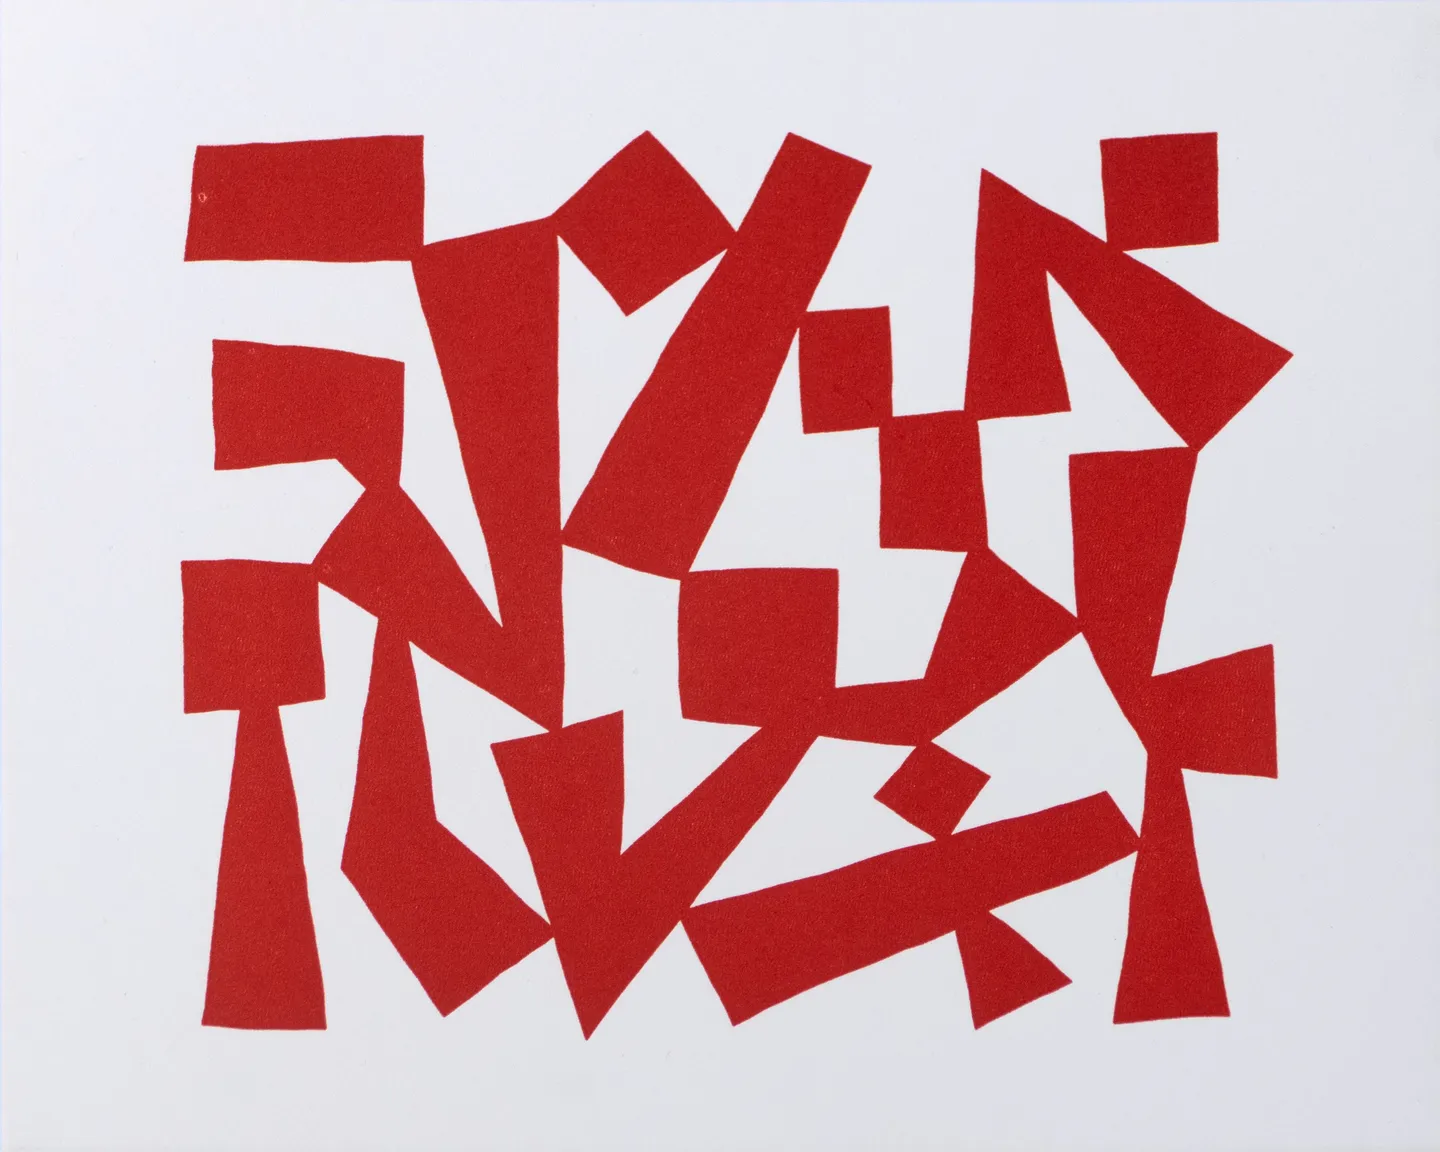
“Experimental”
Instructions
While many of the examples above are rather stylized, the shapes in this system are pretty simple at their core. Here’s an example of a word as I’d normally write it:

That spells introduce. Here’s how the parts correspond to letters:

Notice that the consonants are a series of lines connected in various ways, while the vowels are separate symbols floating above or below. I’ll start by describing how consonants work, then move on to vowels.
Consonants
At its core, every consonant is built around a single line. These lines can be angled in one of three directions:

The length of the line and the amount of straightness or curvature don’t matter. These are all the same (slant up):

These lines can be connected or related to each other in various ways. Here are the consonants from introduce, with their directions and connection types labeled:

These two features — the direction and the connection type — together determine the letter. More specifically, every consonant letter is defined by a combination of:
- A line direction
- The way a line connects to the line before it
Here’s how these features work together to define the consonants of introduce:

* What about N, which doesn’t have a line before it to connect to? I’ll get to that in a moment.
This word demonstrates 3 of the connection types — an angle, a loop, and a jump. There are 7 connection types in total:

(3 directions) × (7 connection types) gives 21 characters for the 21 consonant letters in English. Here’s the full chart of how to write each consonant:

With one exception (J), the direction of a consonant corresponds to the row of a QWERTY keyboard the letter is on: the top row slants up, the middle row is flat, and the bottom row slants down.
We’ve seen how these 7 connection types look between a slanted line and a flat line, but what about other contexts?

* What about an angle connection between a flat line and another flat line? Or between any two lines going in the same direction?

Drawing them like that won’t work, because there’s no way to tell that it’s supposed to be two lines — it just looks like one long line. So in this situation, to create an angle, draw the second line as a vertical line instead of the direction it “should” be going:

This rule applies to T, N, and S, the three letters with an angle connection. So if you have T after an upward-slanting line, N after a downward-slanting line, or S after a flat line, write it as a vertical line. If you’re reading a word, a vertical line connected to something before it means it’s T, N, or S, depending on the direction of the previous line.
The line representing the first consonant in a word does not have any line before it to connect to. Instead, each type of connection has an alternate form when it’s at the start of a word:

If it helps to remember, you can think of the vertical line in jump up and jump down as a representation of the jump itself. For jump right and jump left, you can remember that the beginning curves right or left correspondingly.
The loops for R, C, and H don’t have to go around all the way; they just have to curl around enough to distinguish them from P, B, and D.
Note that vertical lines are used in two different ways:
- To write T, N, or S when they come after another consonant going in the same direction
- To write Q, M, F, W, Z, or L at the beginning of a word
Some examples of these different uses:

That completes all the rules for consonants. To write words, we also need:
Vowels
Vowels are written as marks, somewhat like accents, above and below the consonant lines.

Note that Y is included both here and in the consonant chart. In contexts where Y is used as a consonant (you, yes), it is written as a consonant, while in contexts where it is used as a vowel (my, say), it is written as a vowel. (If it’s the first letter in a word, it’s usually a consonant; in any other place it’s usually a vowel.)
Each vowel is drawn above or below whichever consonant most directly precedes it. Vowels at the beginning of a word are drawn above or below the space before the beginning of the first consonant.

If a word starts with a consonant, I tend to write all the consonants first and then go back and add the vowels. If a word starts with a vowel, I usually write the initial vowel, then all the consonants, then any other vowels. (That’s just what I find easiest.) I did not find it too hard to get used to writing the letters out of order like this.
At this point we’ve seen enough to fully interpret “introduce” from earlier! Here it is again — notice how the vowels are placed:
Consecutive vowels could be written by writing their symbols from left to right:

But to speed things up, the system also has ligatures that combine pairs of vowels into one symbol, which I recommend using. A ligature can go above or below the consonant line, and it can also cross through the consonant line, depending on the pair of vowels.
Generally the directions of the two endpoints of a ligature represent the two vowels: A and E are horizontal ends, I and O are vertical or sometimes diagonal ends, and U and Y are ends that curl around at least 180°.

All of these can be stretched or bent to fit into the context better, as long as the ends are pointing in the right directions:

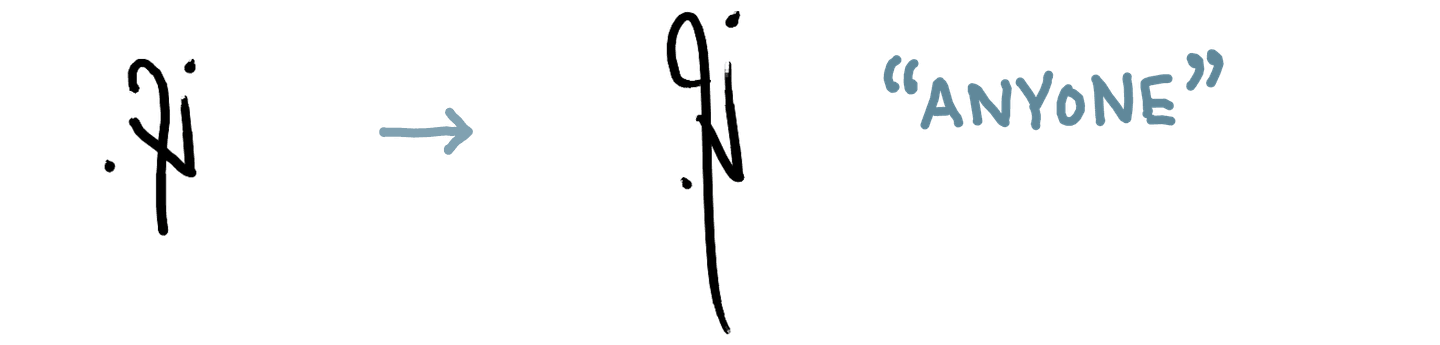
Note that in the last case, a ligature is the only clear way to write this word. If you wrote OY as separate symbols ordered left to right, there would only be space for one of them to be aligned with the vertical line of the N, and so you’d either write anonys or annosy.
There can also be ligatures of three vowels, although I don’t think there are good solutions for every possible combination — I just come up with them when I need them.

Most of these have hard angles in them, which are needed to distinguish them from similar two-vowel ligatures:

In some edge cases, things are just too tight to be completely unambiguous, and some parts have to go in the “wrong” place. In these cases you just have to tell from context.

Punctuation and numbers
Most of the punctuation is formed by replacing dots with circles, so they stand out more and don’t get confused with the word “a” (which is just a dot). I tend to write punctuation aligned to the center of the text, like ⚬ rather than ⚬.

Numerals are written normally. (This does mean that 6 looks like a quote and 9 looks like a comma, but it should be clear from context.)
Fast and expressive writing
As I’ve gotten more comfortable reading and writing in this system quickly, the shapes have changed and become more fluid, sometimes to the extent that a literal reading of the shapes would give the wrong text. The overall shape starts to matter more than the individual parts for my ability to read a word.
Here are some types of changes that have happened for me — if you learn this system and you notice these traits showing up in your writing, it’s not a problem, but rather a sign that you’re getting good at it.
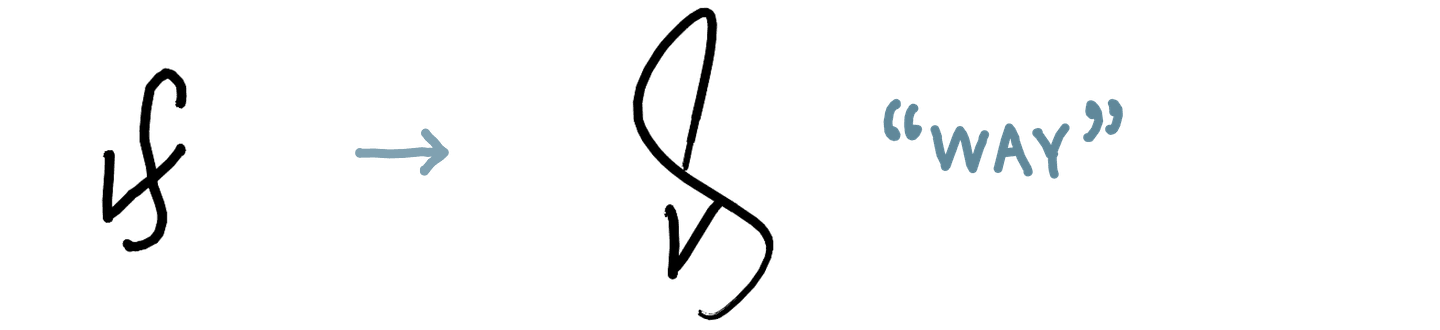
In general, everything becomes more expressive:


Ligatures in particular become larger and more loopy:

The directions of lines become looser; there may be a “flat” line that is actually slanted, but it still reads as flat because it is less slanted than the other lines around it.


Angles become softer:

Separate parts start to connect:


(Reading literally, these would say feeilngs, tt, and doysnt.)
Nearby vowels cluster together, to the extent that a vowel may not be aligned with the right consonant anymore:

(Reading this literally, both of the i’s are above the g, so this says imagiinng. However, I would never read it that way: in a word that actually has two i’s in a row, like skiing, they would be written as a ligature, and so the fact that they are not in a ligature here means they must be part of separate syllables, regardless of where they’re written.)
To emphasize a word, you can elongate it:

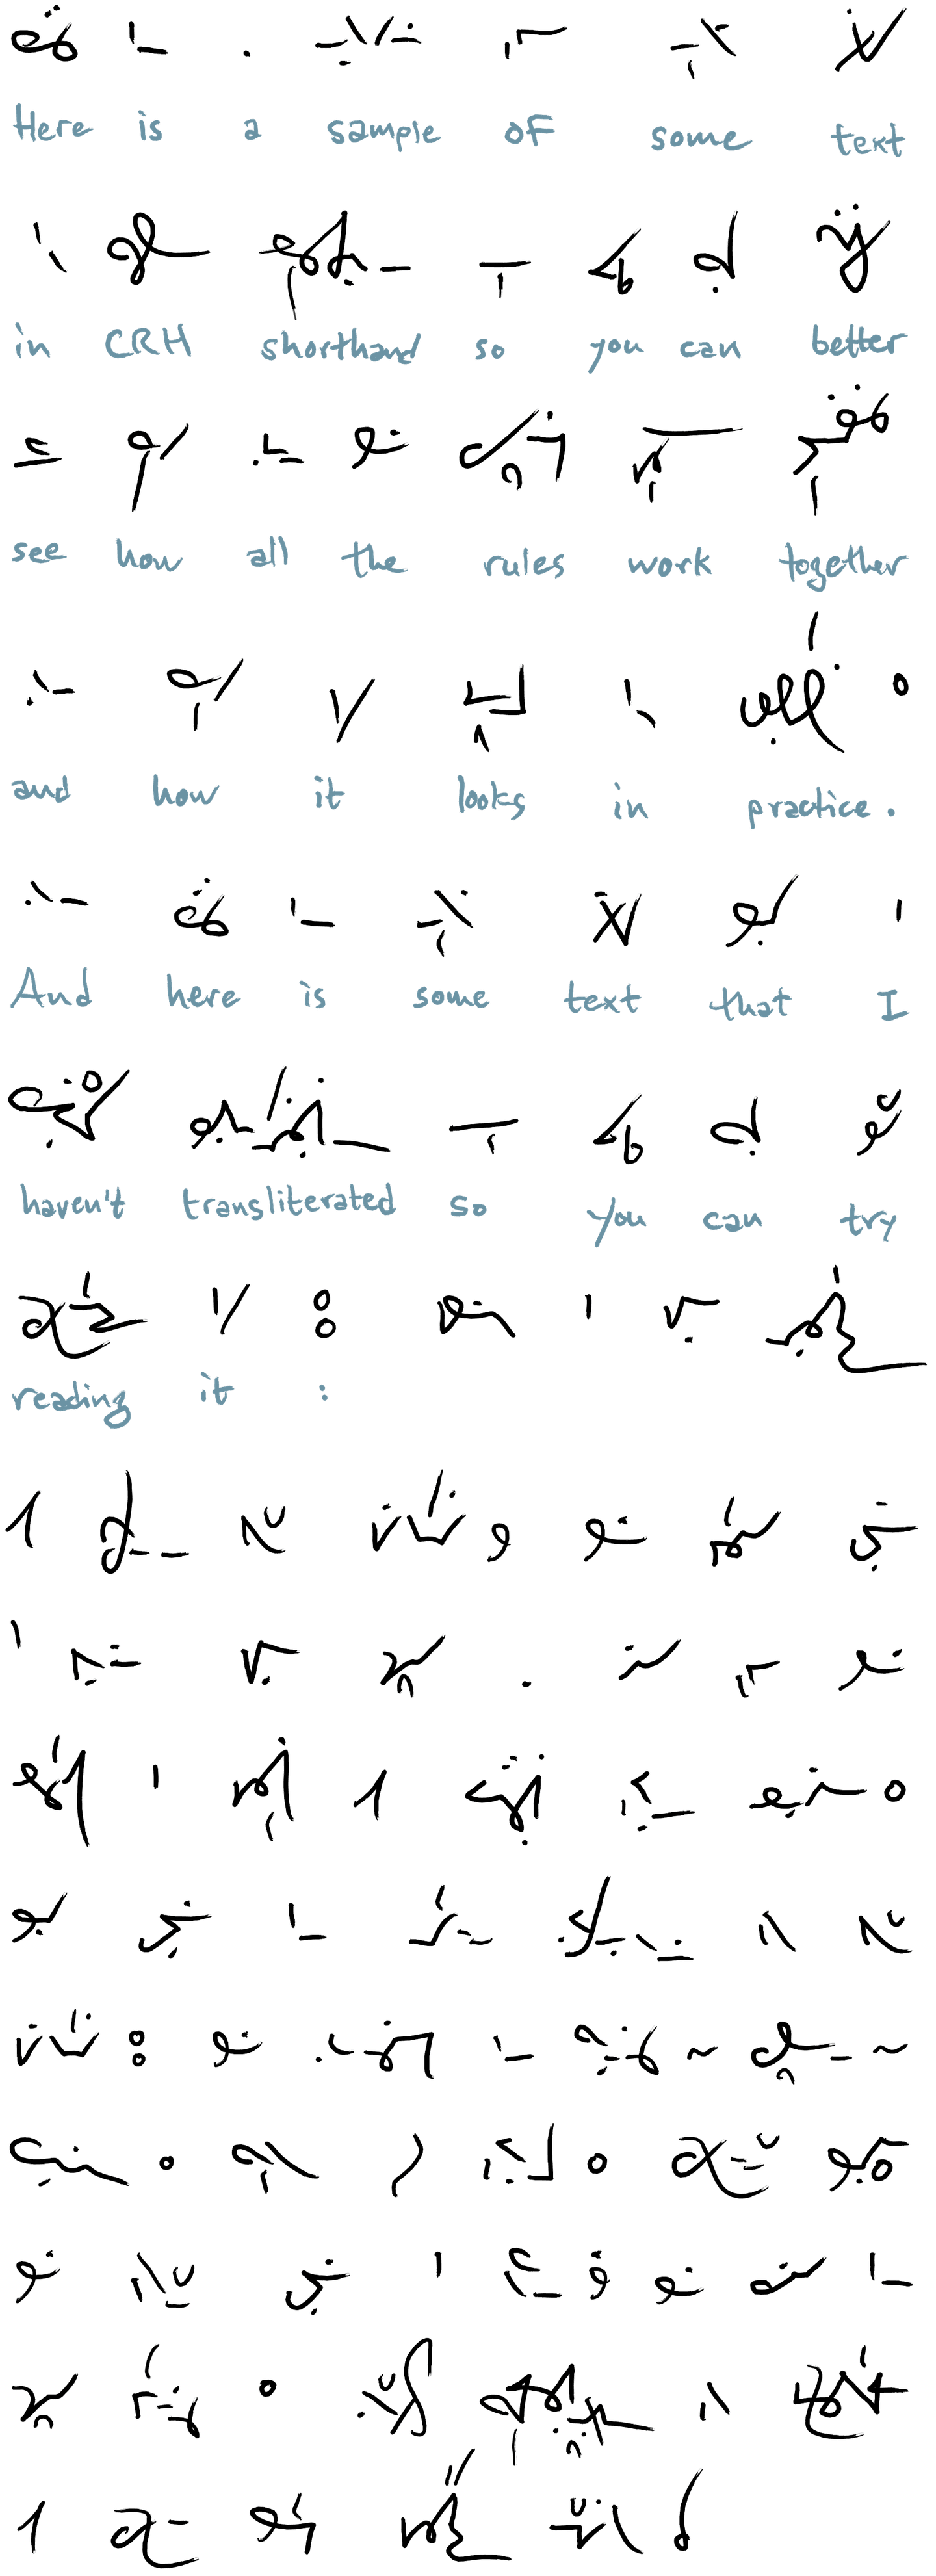
Practice
Design notes
In English, multiple letters are often used to represent a single sound, so most shorthand systems speed things up by writing the sounds of words rather than spellings. However, people aren’t used to writing words phonetically, and I imagine that in learning traditional shorthand systems, it could take a while to wrap one’s mind around this new way of thinking. Since I wanted a system that would be easy for me to learn, I chose to represent spellings rather than sounds, even though that makes it less efficient.
Also, from what I understand, traditional shorthand systems require a fine degree of motor control: when writing a line, you might need to keep in mind its length, direction, curvature, and sometimes even width, all while writing at a rapid pace. This seems like a lot to manage, so I designed this system to only distinguish between three types of lines. Once you start writing a line, all you have to care about is the general direction it’s going: you don’t have to consider length and curvature at all, unless you’re using these features expressively.
However, where lines meet each other, your hand naturally slows down to let you change direction, and so this seemed a better place to introduce finer distinctions in shape. These thoughts led me to the consonant system, with 3 directions and 7 connection types. As described above, a letter’s direction is based on its row in a QWERTY keyboard. (I had to “move” J to the top row to even out the numbers — while the bottom row has 7 consonants for the 7 connection types, the top row has 6 and the middle row has 8.) I assigned more common letters to connection types I thought would be faster, better-looking, or easier to write.
When designing this system, I didn’t pay much attention to its aesthetic value; I was mostly focused on the practical goals of speed and ease of learning. So I was delighted to discover the variety of lettering styles that are possible in CRH Shorthand — it opens up a world of forms that are not possible to access with the regular English alphabet.