
Collage shading system
For the last few years I have been working alongside Barb Meier and my peers from her computer animation courses to make a short film, which partly takes place in an alternate world inspired by a child’s drawings. To create an effect of being inside a drawing, I designed and implemented a non-photorealistic shading system in Maya that renders 3D objects as a collage of flat textures. The film is still in production, but here are a few early tests I made while working out the kinks:
Models, animation, and most of the textures are by my friends in Advanced Animation Production at Brown.
Behind the scenes
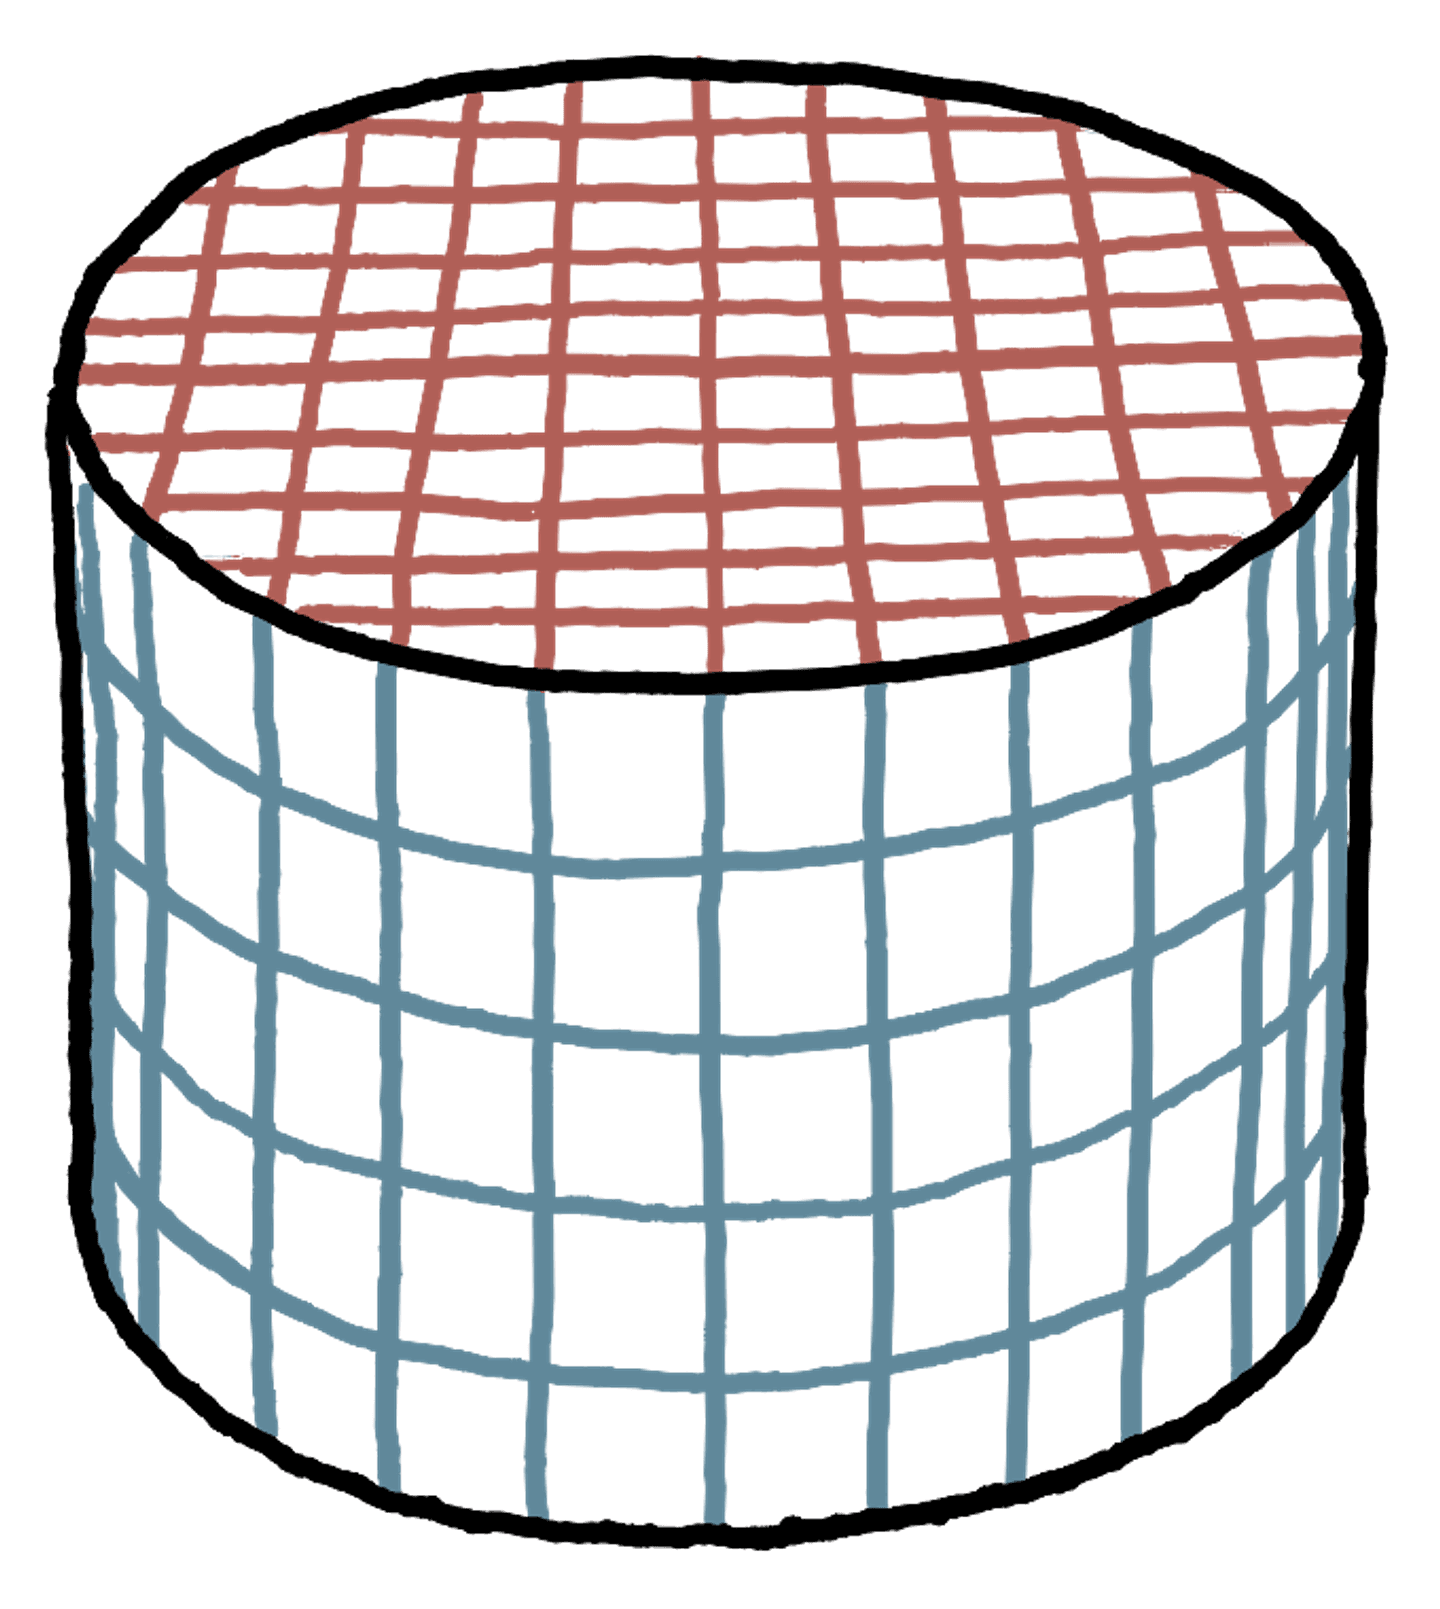
In normal 3D rendering, textures wrap around objects and follow the rules of perspective:
My collage shading system does not do this; rather, textures stay flat on the screen, regardless of how the surface is shaped or how you’re looking at it:
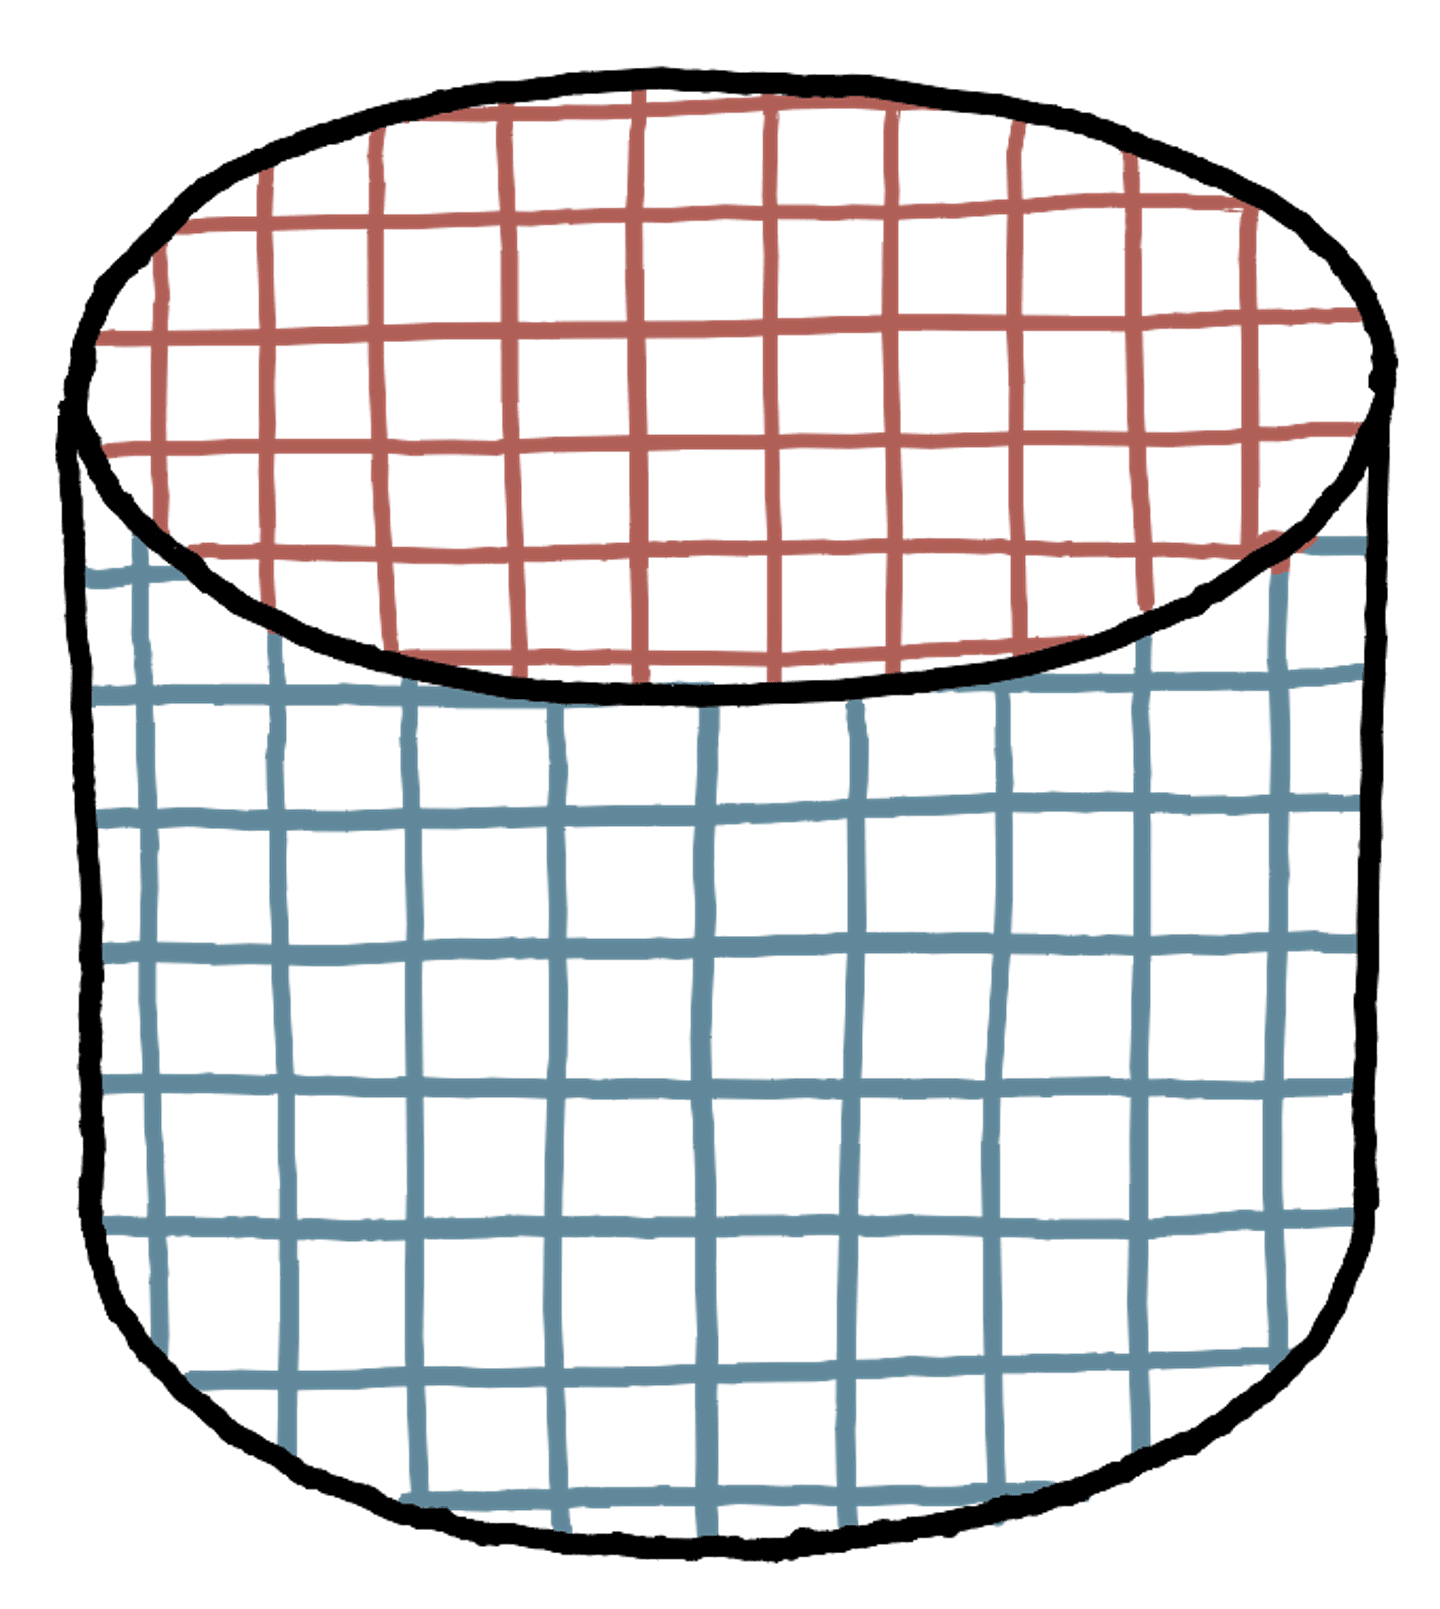
These flat textures move, rotate, and scale to follow the surface as it moves across the screen:
Each of the three sides of the cylinder is filled with its own flat texture image (a camera projection). I call each of these surface regions a facet. Each texture moves across the screen to track a particular point in its facet, and orients itself to (the projection of) a vector in the facet’s transformation space.

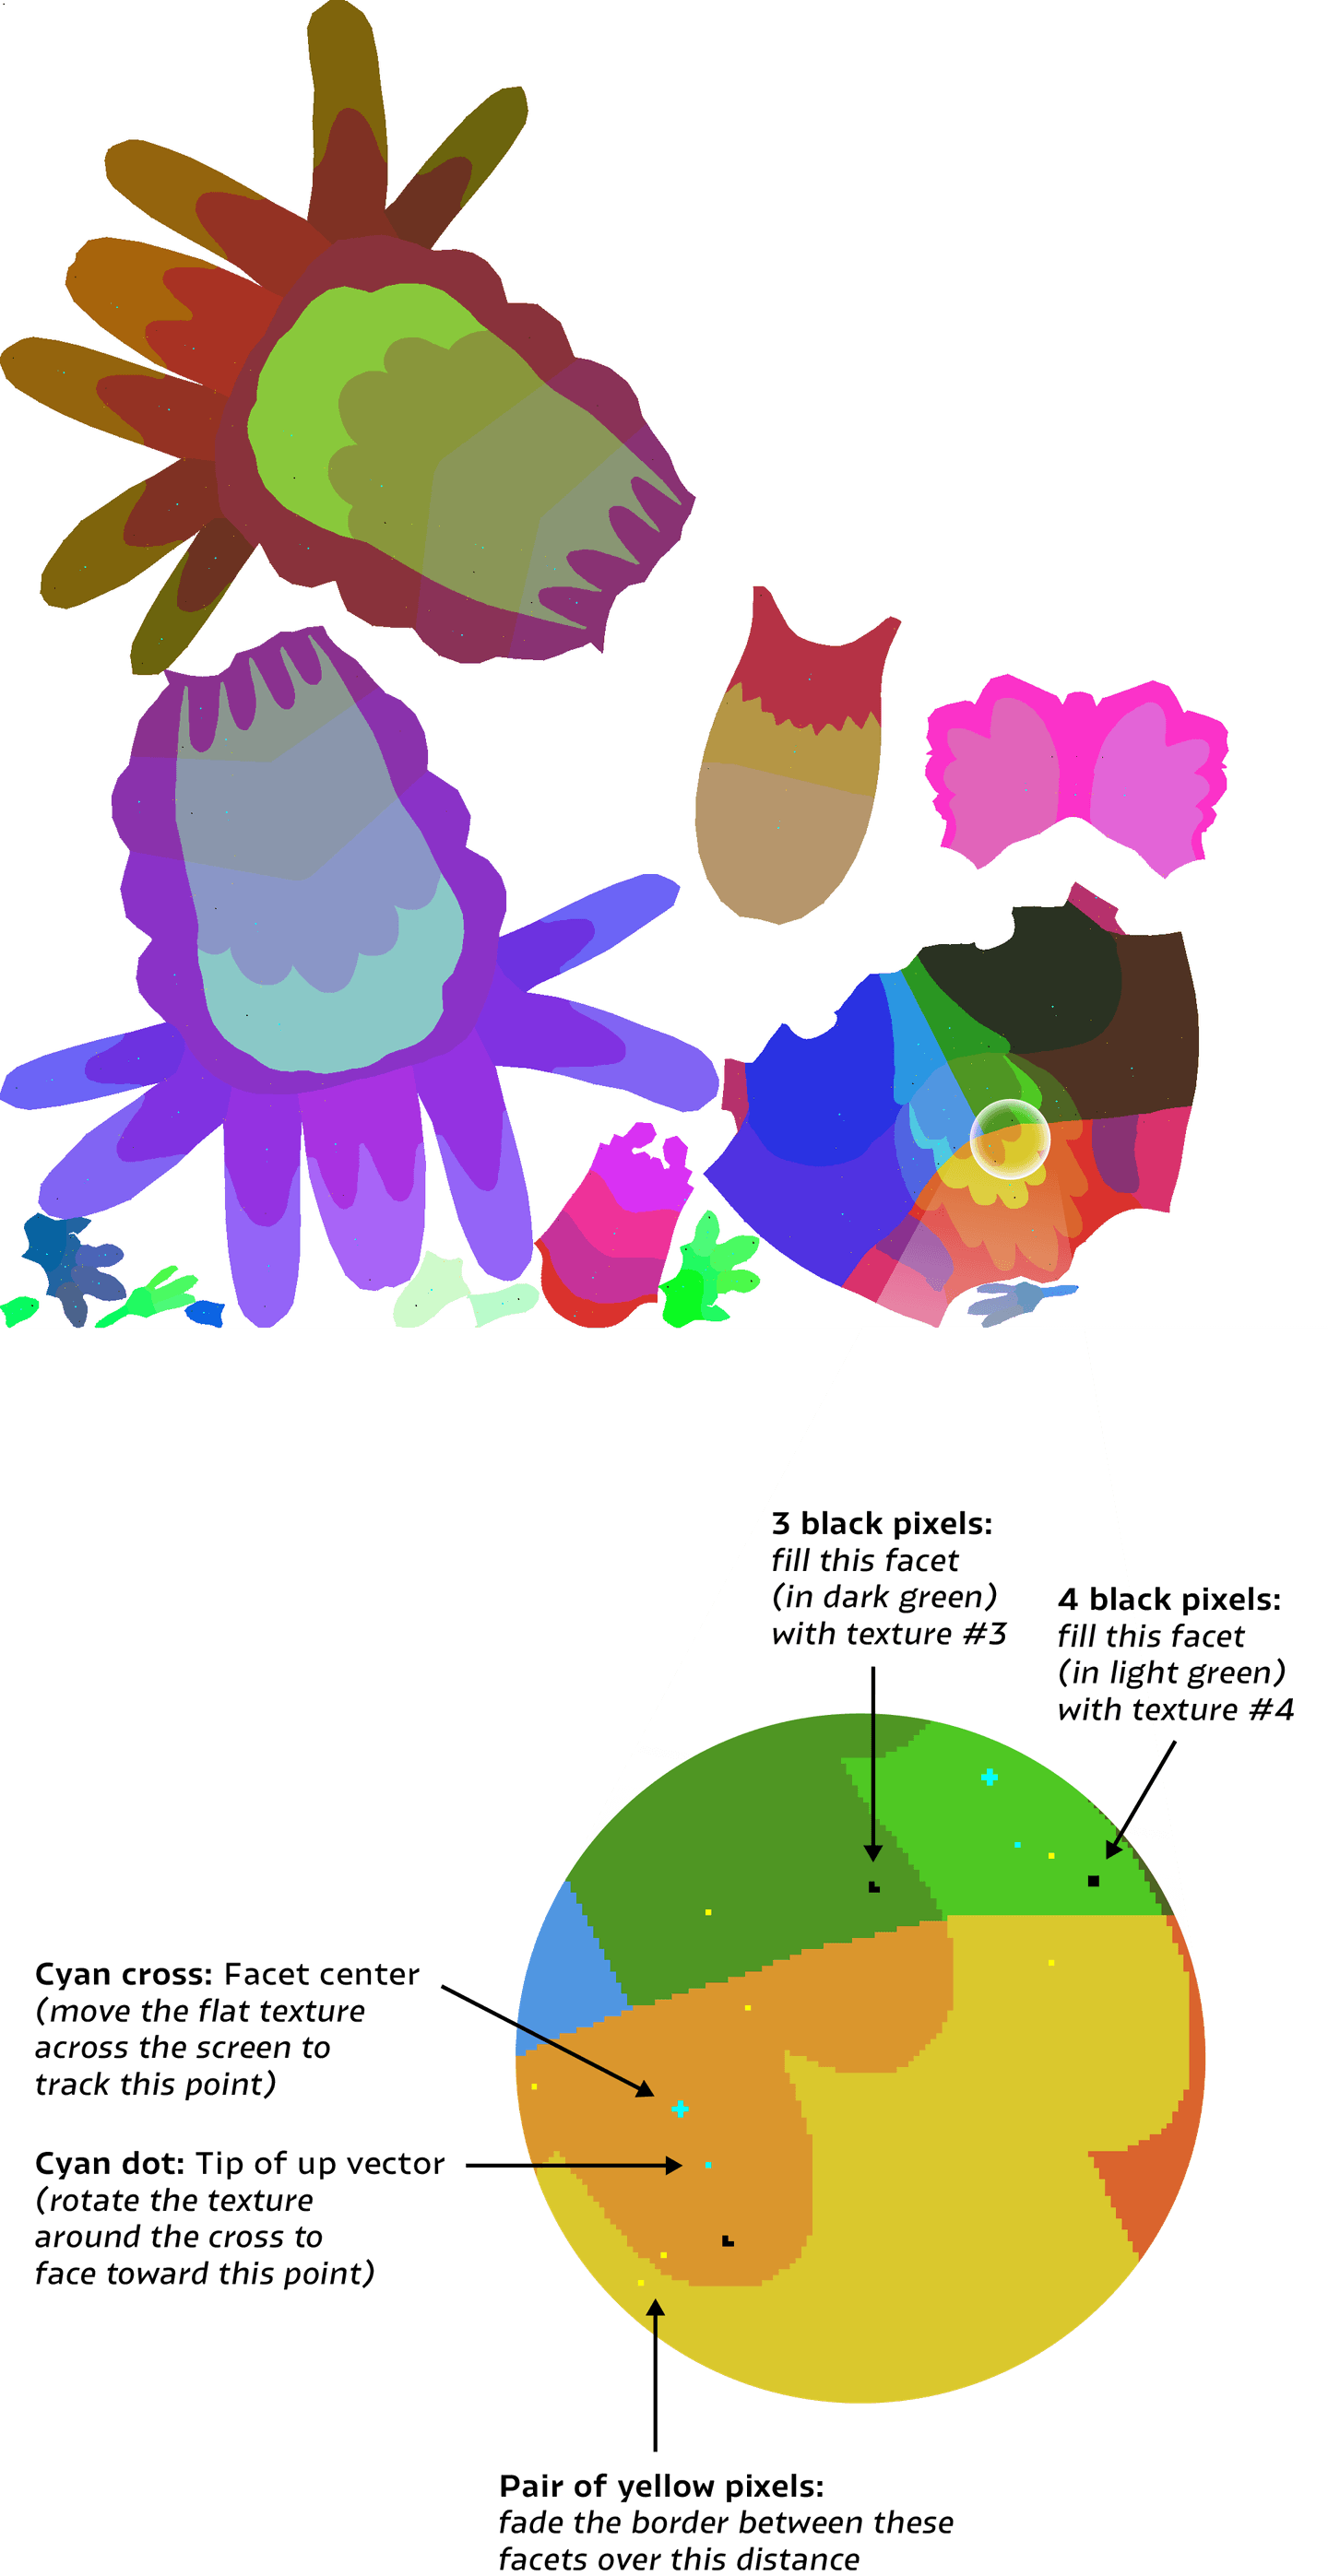
The shading network is generated based on an input image, which specifies all the parameters of the shader. To create this image, I start by painting unique colors on the model’s UV map to specify the boundaries of the facets. Then within each facet, I add patterns of specially-colored pixels that specify which texture files to use, how the projections should be oriented to follow the 3D surface, and how much to blur between facets. My software then interprets that image to generate the shading network. Here’s the image that generated the bird’s shader:
Process
I developed this system over months of testing and critique, and it ended up growing to several thousand lines of code. Some major parts of the process included:
- Creating an interface on top of PyMEL that allows me to deal with shading networks in an object-oriented fashion: a superclass whose subclasses represent different types of shading networks, with functionality to ensure sub-networks are reused whenever possible and to avoid proliferating unused or duplicate nodes
- Doing tests to determine how all the inputs to the place2dTexture node interact with each other, which is not documented anywhere I could find, and deriving equations to translate the coordinate system I needed for texture placement into the one used by the node
- Writing code to sample nearby points on a surface and translate between 3D space and UV space, in order to blur a texture image across a surface
- Designing and implementing a user interface for creating and editing these collage shaders: folders and texture files with particular naming conventions, map images as shown above, text files giving more fine-grained control, Maya nodes allowing many controls to be changed and animated in the scene, and scripts for generating and updating all these elements
- Creating a video tutorial and specification document showing others how to use these things